Getting Started
Hello there!
Welcome to the Snapchat AR Lens Challenge and to the Snapchat Lens creator community! We’re so pleased to have you join us. If you have not done so already, please register to participate in the Snap AR Lens Challenge.
Let's get to it! You have probably worked with Lenses before in your own use of Snapchat. They are the filters you use to add effects, backgrounds, and interactions to the photos and videos you take.
This opportunity is more than just learning technical tools—it’s an experience where you’ll build skills you can apply in AR development, digital storytelling, social media marketing, interactive content design, and beyond.
You’ll develop these skills as you brainstorm creative AR concepts, prototype immersive experiences, build interactive Snap Lenses, and refine storytelling techniques. In the process, you’ll gain hands-on experience in augmented reality development, Lens Studio design, user interaction design, digital storytelling, and prototyping—all essential for roles across data-driven industries.
Let’s Get Into It!
Before we dig in, let's break down the software that you will be working with - Lens Studio. Lens Studio is Snap AR's free AR development platform that empowers users to design and create Augmented Reality experiences in the form of lenses. It let’s your creativity turn into art that other people can interact with in the “real” world. Create viral selfie Lenses and shoppable try-on experiences, or develop never-before-seen ways of connecting with the world around you. With zero setup time and seamless integration with Snapchat, Spectacles, and your mobile and web applications through Camera Kit, you can build AR for anywhere.
If you're new to working in Lens Studio, please watch the following overview video.
Learn more about Lens Studio and download the desktop app. Let’s dive in further about the Snap AR Lens Challenge.
What you need to know:
Through this experience, you will learn to make your own Snap Lenses and share them with the world. This will be a self-guided, self-paced learning experience. The goal is to complete all tutorials by the time we all meet during our live Lens Lab.
Let’s start with this quick warm-up, where you will prototype your own Lens idea.
For each of the tutorials, you will need:
- 💻 A computer
- 📱 Smartphone with Snapchat downloaded
- 🤳 Digital photo of your face (selfie)
- 👻 Lens Studio software downloaded
- 📐 Image editing software, i.e. Adobe Illustrator, Adobe Photoshop, Canva (free), Figma (free), or Inkscape (free)
Before you Continue, Open Your Phone!
The Snapchat app isn’t just social! Yes, it's known for funny lenses, but it enables creators and designers to build a different and creative environment onto our physical world. Take a peak:
Many people don’t know that the Camera Platform Team at Snap developed Lens Studio, the platform that enables any user to go from consumer to producer! The Snap AR Lens Challenge enables anyone to take their 2D designs and facilitates an opportunity to learn how to build for friends to enjoy.
Learn more about Lens Studio and download the desktop app. Let’s dive in further about the Snap AR Lens Challenge.
Step 1: Familiarize Yourself with AR
Augmented Reality is changing how we shop, learn, and experience the world—blending digital magic with everyday life. From interactive filters to immersive storytelling, AR is shaping the future.
Real-World AR Examples Changing Industries
1. Social Media – Lenses That Go Viral
Before AR, brand awareness relied on static ads and product placements that audiences could easily scroll past. Now, with interactive lenses like Taco Bell’s “Taco Head,” users become part of the brand experience, transforming their faces into tacos and sharing it with friends. This playful, immersive approach skyrocketed engagement, reaching 224 million views in a day, a scale traditional advertising could never achieve.
AR isn’t just showing a product—it’s letting audiences play with it, share it, and spread the brand message organically.

ADDITIONAL (OPTIONAL) READ: Dive deeper into the Taco Bell case study to explore how their “Taco Head” AR lens broke engagement records, increased brand visibility, and set a new standard for interactive marketing. Read the full story.
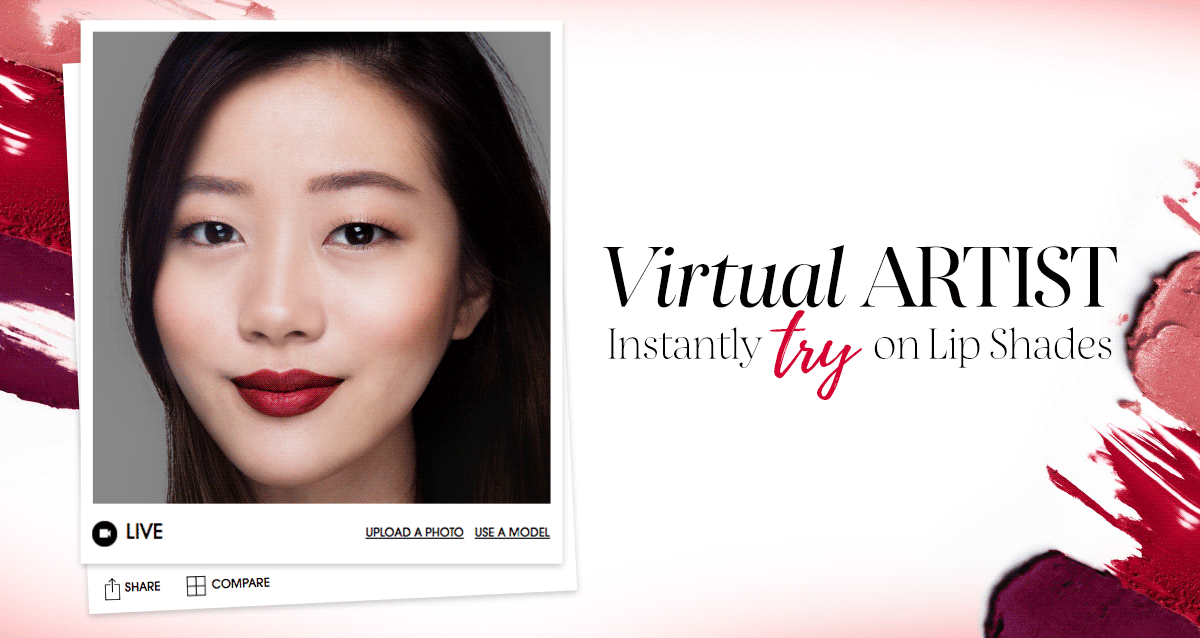
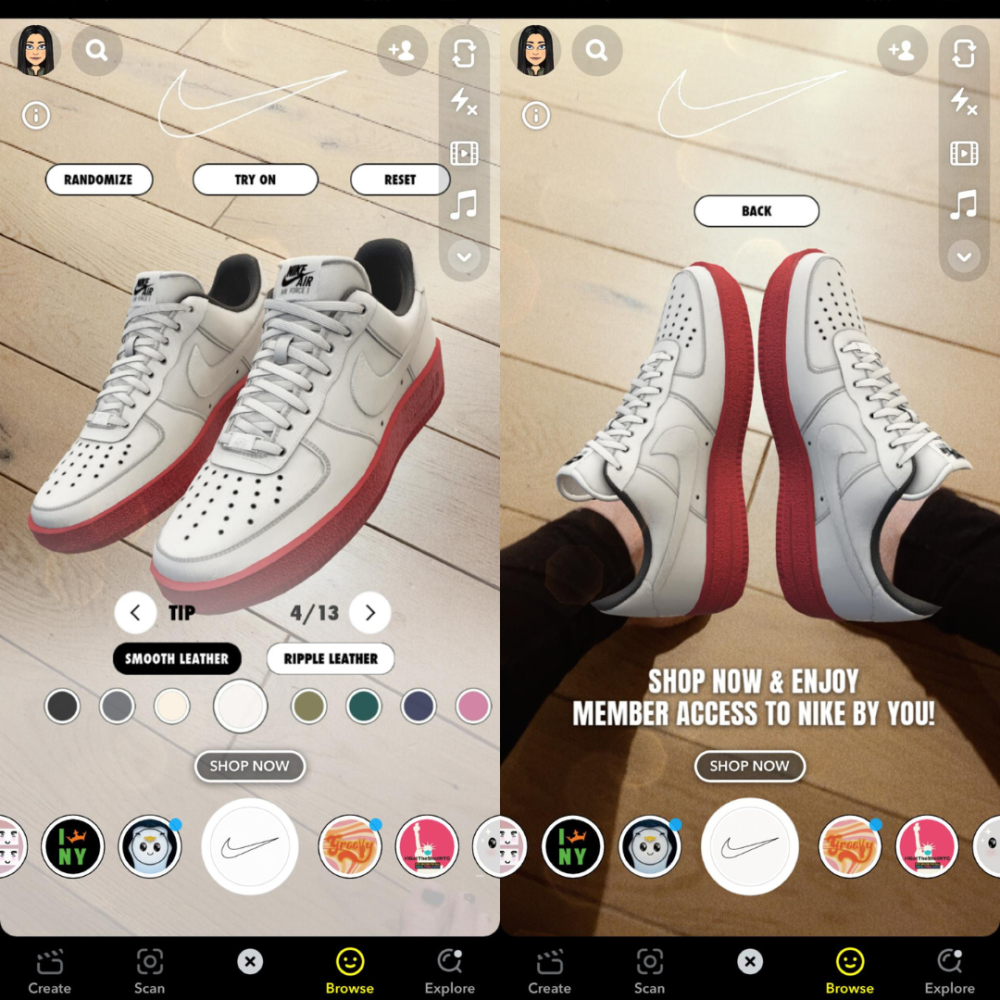
2. Retail & E-Commerce – Try Before You Buy
Before AR, online shopping meant guessing how products might look or fit, leading to uncertainty, lower customer satisfaction, and higher return rates.
Enter Sephora’s Virtual Artist app, which lets customers try makeup virtually, transforming passive browsing into interactive shopping experiences. This innovation not only boosts user confidence but also drives a 30% increase in online conversions. Similarly, Nike’s AR shoe-sizing tool tackles a common e-commerce pain point: incorrect sizing. With precise measurements, it reduces returns and enhances customer satisfaction, proving that AR is reshaping how we shop.
ADDITIONAL (OPTIONAL) READ: Discover real-world AR success stories: Explore case studies on AR marketing and how brands like Sephora use virtual try-ons to drive sales. See how Nike uses AR to improve online shopping: This article explains how AR sizing reduces returns and enhances the customer experience.
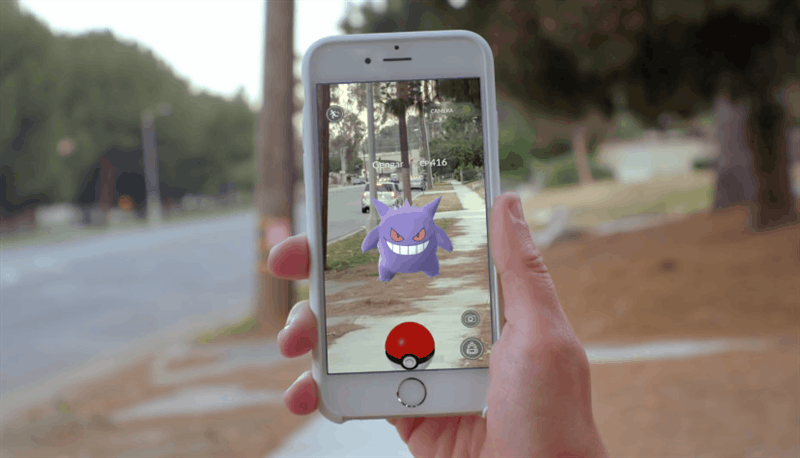
3. Sports & Gaming – Play Beyond Reality
Before AR, gaming was confined to screens—a stationary, indoor experience. Players interacted with virtual worlds, but those experiences were disconnected from their physical environment.
Pokémon GO changed the game by bringing AR into real-world spaces. With over 1 billion downloads and $6 billion in revenue by 2023, it transformed parks, streets, and landmarks into interactive playgrounds. Players now explore their surroundings, fostering social interaction, physical activity, and a new form of immersive gameplay.
ADDITIONAL (OPTIONAL) READ: Explore further Why Did Pokémon GO Succeed? – This article reveals how AR enhances user engagement and the psychological triggers behind the game’s global success.
AR is no longer the future—it’s the present. And with platforms like SnapAR leading the charge, the possibilities are endless. Beyond gaming, retail, and social media, AR is also revolutionizing healthcare, education, training, finance, and business, making industries more immersive, efficient, and innovative.
The Future is Augmented
Some of the most groundbreaking uses of AR come from platforms like SnapAR, empowering developers and brands to build immersive and interactive experiences.

Understanding AR is more than just keeping up with technology—it’s a gateway to future-proofing your career. The demand for AR and VR specialists has surged significantly as industries increasingly adopt these technologies. According to recent reports, the AR and VR market is expected to grow at a compound annual growth rate (CAGR) of 25% from 2023 to 2030, creating new job opportunities in various fields such as healthcare, education, retail, and entertainment. This surge reflects the increasing need for professionals who can design immersive experiences that enhance audience engagement and drive innovation. With platforms like SnapAR offering easy-to-use tools, you can create experiences that seamlessly blend the physical and digital worlds. As AR technology continues to evolve, these skills will become even more valuable across industries.
Additional Resources – Explore AR in Action
Dive deeper into real-world AR applications and understand how these technologies are reshaping industries. These resources provide insights into how brands and developers are leveraging AR to enhance user experiences.
- Snapchat Lenses & Filters
Explore how real-time AR effects transform everyday moments on social media. This video showcases how brands use AR filters to increase engagement, with real-time overlays on faces and surroundings. - AR Shopping (SnapAR x Gucci)
See how Gucci’s virtual shoe try-on makes online shopping more interactive and reduces buyer hesitation. This partnership allows users to try on digital sneakers via AR, boosting customer engagement. - Snapchat’s Landmarkers
Discover how AR brings iconic real-world locations to life through interactive overlays. Land markers allow users to experience AR animations tied to physical monuments. - Bitmoji & AR Avatars
Learn how personalized AR avatars blur the line between virtual and real-world interactions. Bitmoji avatars are integrated across messaging and social platforms to create immersive self-representation. - AR in Sports (NFL & SnapAR)
Explore how AR delivers immersive sports experiences through interactive replays and real-time stats. SnapAR partners with the NFL to deliver real-time player stats and dynamic overlays during live games.
Step 2: Navigating Lens Studio
What is Lens Studio?
Lens Studio is a free, powerful tool by Snap Inc. that allows you to create Augmented Reality (AR) experiences for Snapchat. It’s where all those fun and interactive lenses (or filters) are made—from face masks to 3D animations floating in the real world. You can use 2D images, 3D objects, and even interactive scripts to design lenses that people worldwide can enjoy.

Think of it as a playground where creativity meets technology. Whether you’re an artist, a coder, or just curious, Lens Studio gives you the power to turn your imagination into reality. It uses advanced features like face tracking (to follow your facial movements) and world tracking (to place virtual objects in your surroundings).
The best part? You don’t need to be a coding wizard. Lens Studio provides beginner-friendly templates to get you started while allowing advanced users to customize with JavaScript for interactive magic.
Get to Know the Lens Studio Platform
💡 If you haven’t done so already, download Lens Studio now!
Understanding the Lens Studio interface is essential to getting started with your AR lens creation. It allows you to navigate the tools effectively, customize objects, and bring your creative vision to life. Using each panel helps you design, preview, and debug your lens efficiently.
.gif)
Whether you want to create fun selfie filters, immersive world lenses, or interactive AR experiences, mastering the interface is the first step. With a solid grasp of the workspace, you can quickly translate your ideas into engaging and polished AR lenses that captivate users.
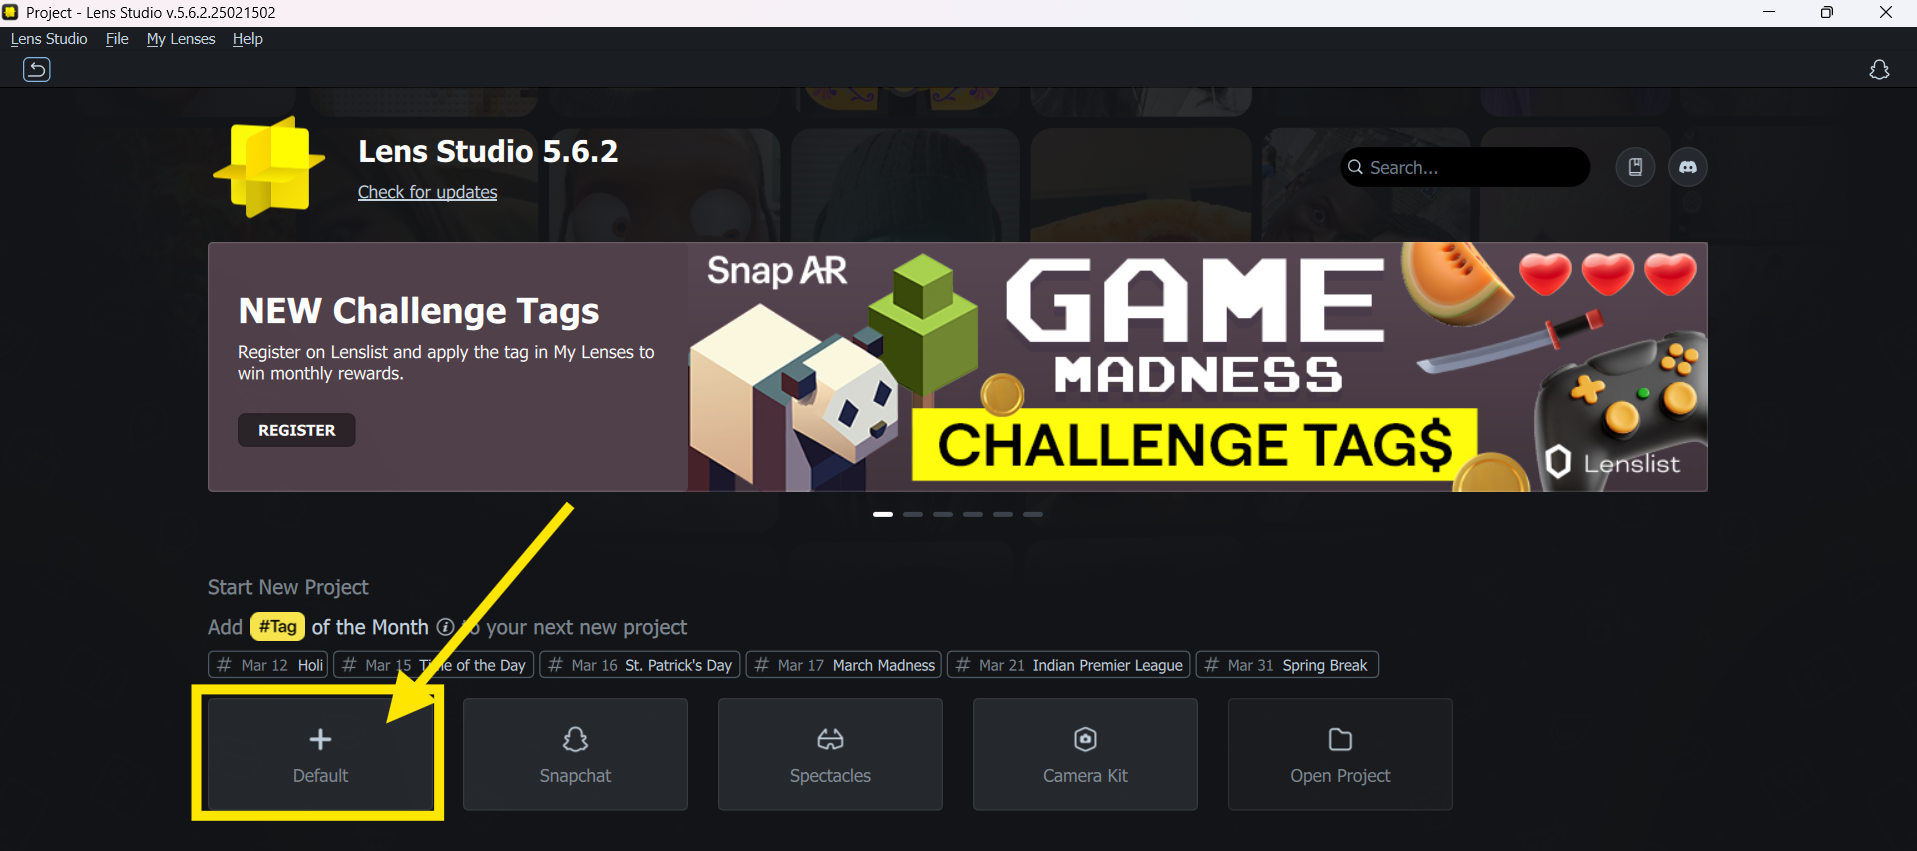
So, let's get started! Open your Lens Studio and begin a fresh project.
Opening Your First Lens Project
When you first open Lens Studio, you are greeted with the Home window. This window provides a starting point for getting inspired or continuing your next great Lens.
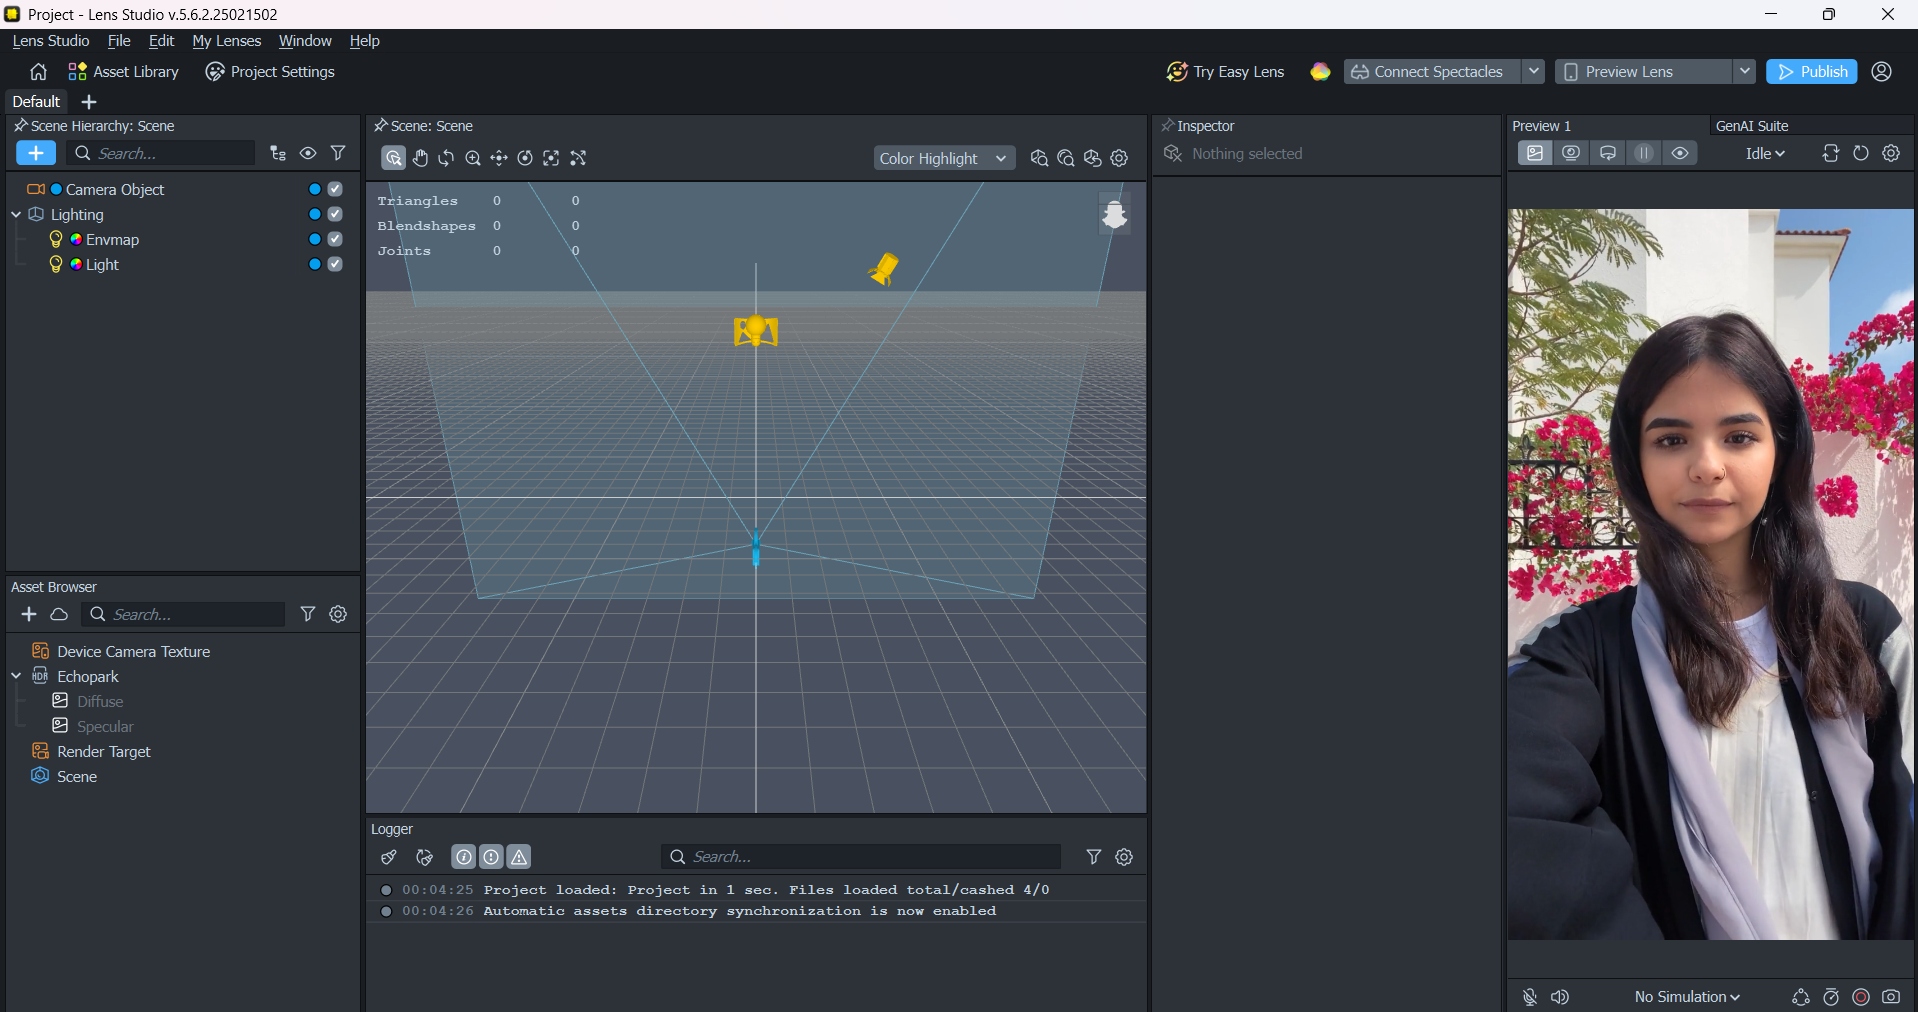
Scene Panel - The Heart of Your Snap AR Lens Panels
A scene can contain multiple objects like 3D models, lights, and effects. For example, adding a virtual object (like a floating hat or an animated pet) appears in the scene. You can also interact with these elements by adjusting their properties through different panels in the interface.
.png)
Top 5 Sections You Need to Know
- Scene Hierarchy: Lists and organizes all objects in your lens.
- Asset Library: Stores images, 3D models, sounds, and other assets.
- Inspector Panel: Edits object properties like position, size, and effects.
- Preview Panel: Shows real-time updates of your lens.
Logger Panel: Displays system messages and helps troubleshoot errors.
.png)
Watch this video - it breaks down exactly how these panels work together in building your AR lenses!
Step 3: Learn How to Create a Selfie Lens
Ever Wondered How Those Cool 3D Hats Stick Perfectly to Your Face, No Matter Where You Move?
It all comes down to a concept called binding.
Binding is a core feature of SnapAR tracking. It allows virtual objects to stay fixed on specific parts of your face or head, creating immersive and interactive experiences.
Is Changing Eye Color an Example of Binding?
Not exactly. Changing eye color is not an example of binding. While it involves face tracking, binding refers to attaching virtual elements (such as hats, glasses, or face masks) to tracked points on the face or body. Binding comes in different forms, each serving a unique purpose:
- Head Binding: Keeps objects aligned with head movements (e.g., hats, headbands).
- Face Binding: Attaches external objects to facial features like the eyes, nose, or mouth (e.g., glasses, beards, face masks).
Body Binding: Anchors virtual elements to body movements (e.g., clothing overlays, AR tattoos).
How Does Binding Work?
Watch this video to explore head binding in detail. It shows how to attach a cap from the asset browser and demonstrates the ease of bringing virtual objects to life.
Did You Notice the Word 'Prefab' in the Video?
A prefab is a pre-made, reusable object from the asset library. Prefabs save time by letting you drag and drop complex assets into your scene. But there’s more – the GenAI Suite allows you to create your own prefabs, giving your lens a personalized touch.
With a grasp of binding and prefabs, you're now ready to take your lens to the next level—by adding your creative touch or advanced interactions.
How Do You Want to Build Your Lens?
Now comes the fun part—customizing your lens to match your vision! You have two exciting options to explore
🚀 Choice A: Refer GenAI Suite to Add Something New
GenAI Suite in your selfie lens can be used to generate and customize virtual garments by selecting types or styles, and textures.
Take a look at this video to explore how to personalize your lens using GenAI Suite for unique virtual try-ons.
🚀 Choice B: Basic Scripting to Add More Custom Interaction
Custom scripting is used for creating interactive behaviors and enhancing user engagement.
Take a look at this video to understand how to use Tween.js for animations and dynamic object control in detail.
🧠 Are there ideas buzzing in your head right now? It’s time to organize them, Grab a piece of paper and ask yourself these key questions:
- What object do I want to attach? Is it already available in the asset library, or will I need to create it using the Gen AI suite? You’re in control! If you’re feeling creative, you can even explore custom design options to truly make it your own.
- Now, think about the perfect place to attach this object. Is it best positioned on the head, in the hands, or somewhere else? The choice is entirely up to you!
Jot these thoughts down, and let them be the foundation of your lens creation journey.
By now, you should have a solid starting point for building your very own selfie lenses. Take a moment to reflect on how these tools can bring your ideas to life. The possibilities for personalizing and enhancing your creations are endless. Ready to dive in?
Step 4: Learn How to Make Your Own World View Lens
With World Lens, you can bring virtual objects to life in a user's environment, creating immersive and engaging experiences.

Whether it's playful animations, realistic 3D models, or interactive storytelling, this tool enables you to bridge the gap between the digital and physical world. Let’s dive in and explore how to enhance your scene using device tracking and interactive controllers.
What Objects You Can Bring to the World?
Think about your vision—what do you want to place in the real world? There’s no limit to what you can create. Maybe you want to:
- Bring a 3D character to life like a playful elephant doing flips or a robot waving hello.
- Add realistic props like a floating soccer ball, a treasure chest, or even a cartoon character.
- Set the scene with environmental effects, such as falling snow, glowing fireflies, or a mystical fog rolling in.
Watch this short video that allows a cute elephant to appear in real time on the grass and do a flip! Have some fun!
If you could bring any object into the world—what would it be? Whatever comes to mind, World Lens can make it happen.
How Does the Elephant Stay Put in the Video?
It’s because of Device Tracking!
The Device Tracking component allows you to place objects in your Lens Studio experience that will be locked to the world. This ensures your 3D objects stay in place relative to the real environment.
With device tracking, you can:
- Place objects on surfaces (like tables or the ground).
- Make objects follow the user's movement.
- Lock objects in one spot, even as the camera moves.
Read here to understand different types of device tracking.
Spotted the ‘World Object Controller’ in the Video?
The World Object Controller is a tool in Lens Studio that lets users interact with virtual objects. With this, users can:
- Move objects by dragging them.
- Rotate objects to view them from different angles.
- Resize objects by pinching or stretching them.
Imagine allowing users to resize a virtual sunflower or rotate a model of the solar system to explore planets up close. The World Object Controller puts this power in their hands, making the experience more dynamic and personalized.
By adding this controller, you open the door to playful and dynamic AR experiences. Now that you know the fundamentals of device tracking and object manipulation, it’s time to level up your Lens!
How Do You Want to Build Your Lens?
Now comes the fun part—how will you shape your world?
You’ve got two exciting paths to choose from:
🌎 Choice A: Refer to GenAI Suite?
In GenAI suite, Immersive ML effect lets you add your own effects to the camera! These effects help personalize interactions, enhance animations, and create adaptive experiences based on user behavior.
Check out this video to explore some of the cool effects in Snap AR and how you can apply them to your own project.
🌎 Choice B: Basic Scripting to Add More User Interaction?
Custom scripting is used for adding events and defining how objects respond to user input.
With basic scripts, you can:
- Make a robot dance when tapped.
- Change an object’s color when a user swipes.
- Trigger sound effects when a virtual door opens.
Check out this video to understand how using only 11 lines of code can help the elephant act on two events: [jump, idle] state.
World Lens makes it easy to add virtual objects to the real world. By using Device Tracking and the World Object Controller, you can make your objects stay in place and interact with users. Whether you choose the advanced GenAI Suite or simple scripting, you can create fun and unique experiences. Now it’s your turn—start building and let your imagination shape the world around you!